INTRODUCTION
In this project, I wanted to make an expressive piece to reflect on how I’ve been feeling recently about all the conflicts that have been happening in my country.
I really enjoyed working with fabric speakers and thermochromic ink and wanted to explore them more by incorporating these methods in my project.

WHAT AM I MAKING?
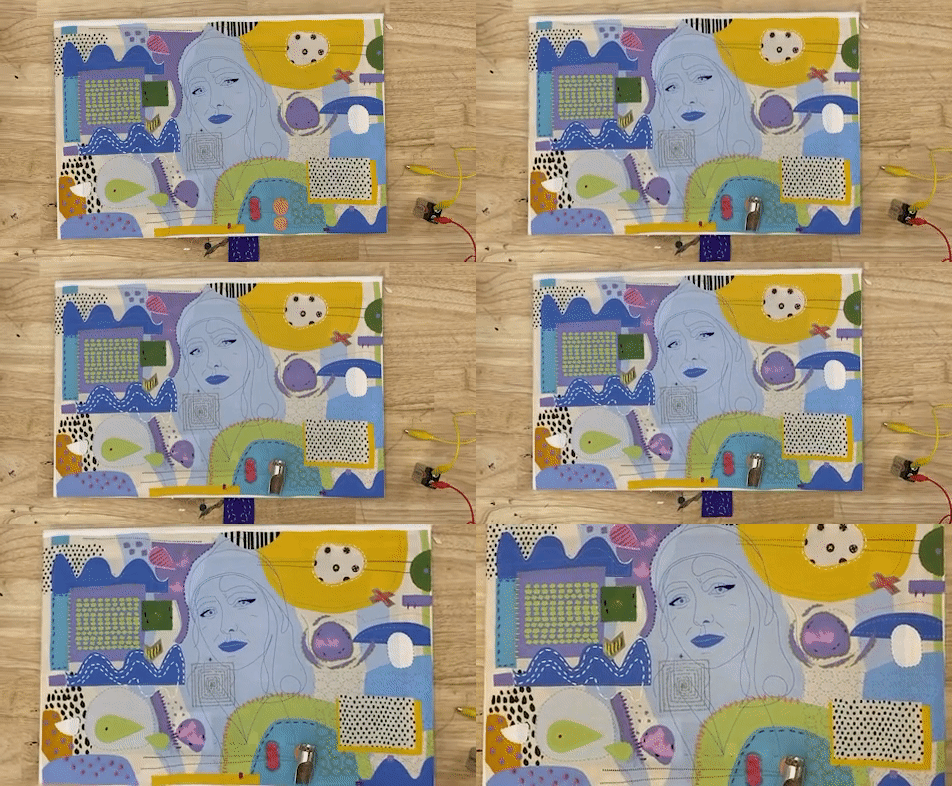
An interactive abstract illustration. I used bright colors and dancing shapes around my self-portrait to show the happy life that I have been having in New York City. As soon as one touched the touch sensor some words appear randomly in the illustration. Those are cuss words in Farsi showing although it seems I have a happy life here, I am angry and sad because of all the bad news. Initially I wanted the speaker to work as well when one touches the touch sensor, but for that purpose I had to use a … which is a bit hard to work in my tight timeline, so for now I used a mini amplifier to play a music manually. I played a Persian rap music that was made about Iran’s current conflicts.
PROCESS
At first, I started to paint and stitch everything from scratch. I chose a 30x36 inch cross-stitch fabric and started to stitch a fabric speaker on it.

After painting it with thermochromic ink and stitching a fabric speaker on it, I realized that this fabric is not suitable for e-textile purposes and I had to switch to work on another fabric.
This time I drew an illustration in my computer and printed it on a cotton sheeting fabric


I then stitching the speaker fabric on this fabric. This fabric was light and thin; therefore, I knew e-textile is going to work well on it.
Here is what you need to make a fabric speaker:
-
Conductive thread
-
Regular thread
-
A piece of regular thread
-
A powerful magnet
-
A mini amplifier
I followed our professor Liza Stark’s tutorial on how to make the speaker. First, you need to cross the conductive thread into the fabric only once and leave a couple of inches behind the fabric. At this point, we do not need a conductive thread into a needle anymore. Needle your regular thread and using this embroidery stitching method, sew the speaker.

For making the mini amplifier I again followed Liza’s tutorial. Here you can find a very well follow through tutorial.

After that, using thermochromic ink, I painted over some parts of my illustration.

On separate pieces of fabric, I stitched some words using conductive fabrics. I am going to connect all the words using conductive thread behind all the parts that I have painted with thermochromic ink so when the current runs through my heating circuit, the thermochromic ink only changes on top of the words that I stitched, and make them visible.

I want my heat circuit to activate with a touch switch. Using copper fabric, I made 2 touch sensors and stuck them to the fabric with heat and bond papers.

I did not use an Arduino, thinking my body is conductive enough to close the circuit by touching the touch switch, but after trying and talking to Liza I figured that I have to use an Arduino (in this case an AT tiny) to make this touch sensor work. Here is the code that I used to make my touch sensor.

Now It was time to attach the magnets at the back of my fabric speaker. I knew my fabric is not strong enough to hold these heavy magnets, so I made a support system using a wooden frame at the back of my illustration. I tried to keep the magnet closer to the fabric speaker by stitching my support thread to my fabric.


Viola!

